/plugins/shopify
Shopify Checkout Application
This guide covers the installation, configuration, and activation of the Snap Finance Checkout plugin on your Shopify store. Once live, customers will be able to complete a full finance journey (application, decision, offer, and payment) through Snap Finance on your Shopify store's checkout.
The integration is in four stages: Installation, Configuration, Activation, Verification.
Before you begin
Before you begin you will need:
- A UK-based Shopify store (any Shopify plan is supported).
- Admin access to your Shopify store.
- Your Snap Finance credentials (Merchant ID, Sandbox and Production client IDs and secrets).
If you do not have your credentials, or encounter any issues during the integration, please contact your Snap Finance account manager.
Installation steps
Step 1: Installation
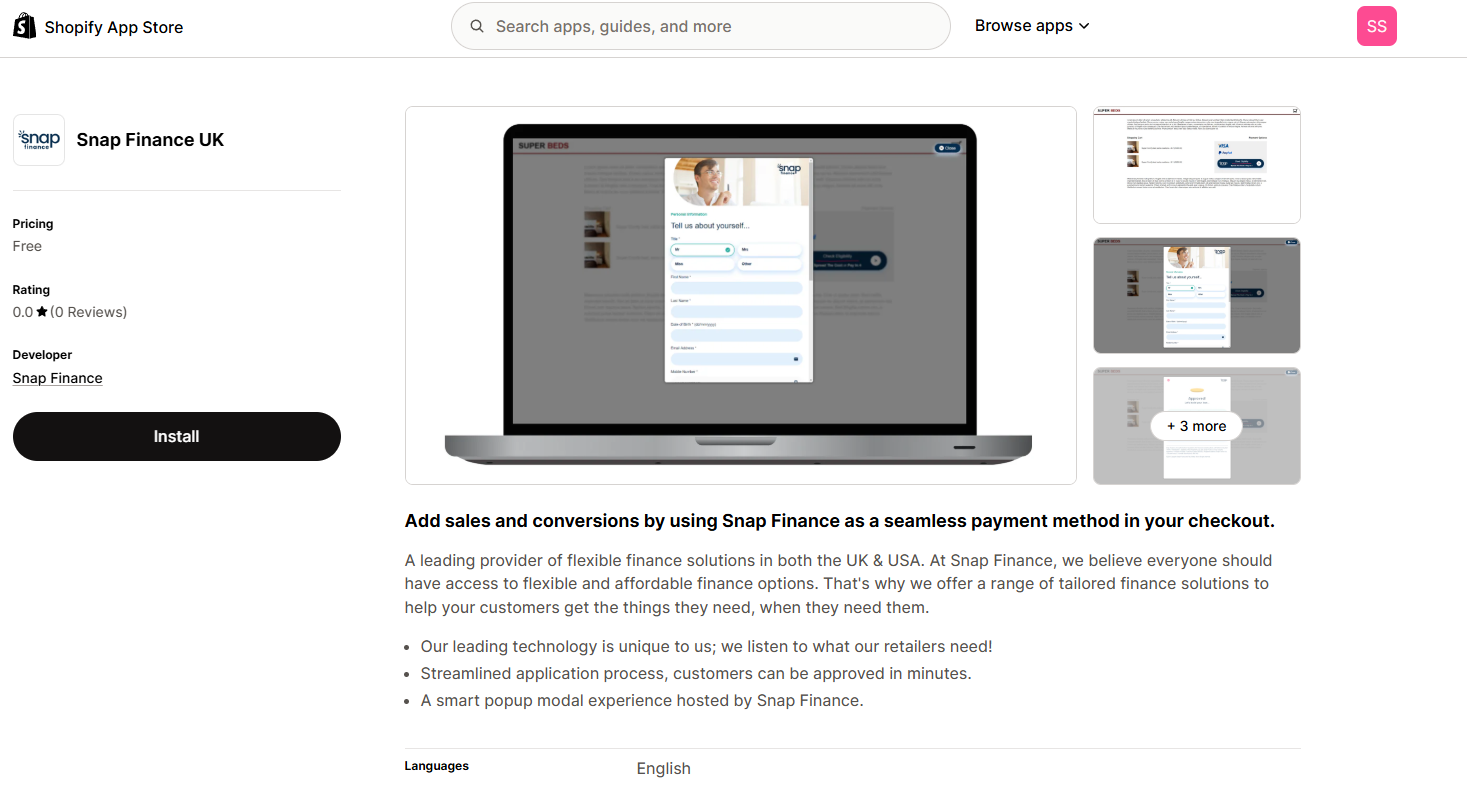
• Open the plugin listing on the Shopify app store here.
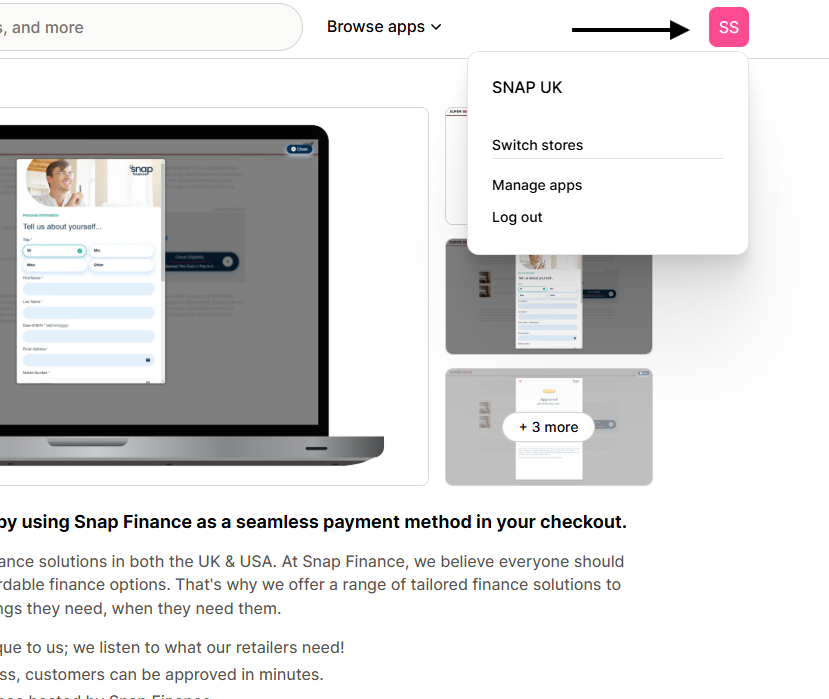
• In the top right of the Shopify App Store page, confirm the correct store is selected. (You must be logged into your Shopify account. You can log in to your account here).
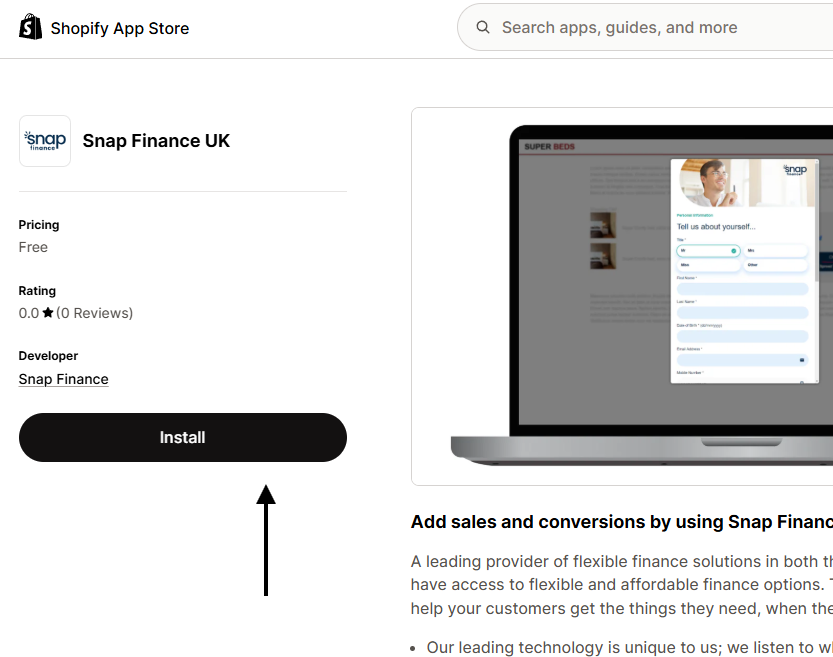
• Click Install. Shopify will redirect you to your admin dashboard and display a confirmation dialog.
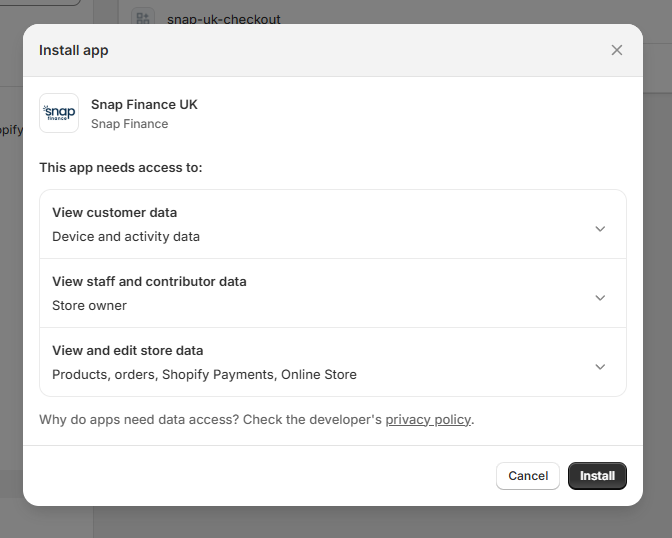
• In the dialog, click Install again. You will be taken to the plugin's configuration screen.
Step 2: Configuration
On the configuration screen, enter the credentials provided by your Snap Finance account manager:
| Field | Description |
|---|---|
| Production Merchant ID | Your unique Snap merchant identifier |
| Sandbox client ID | For test transactions |
| Sandbox secret | For test transactions |
| Production client ID | For live transactions |
| Production secret | For live transactions |
The Retailer Webhook URL and Retailer Redirect URL fields are optional.
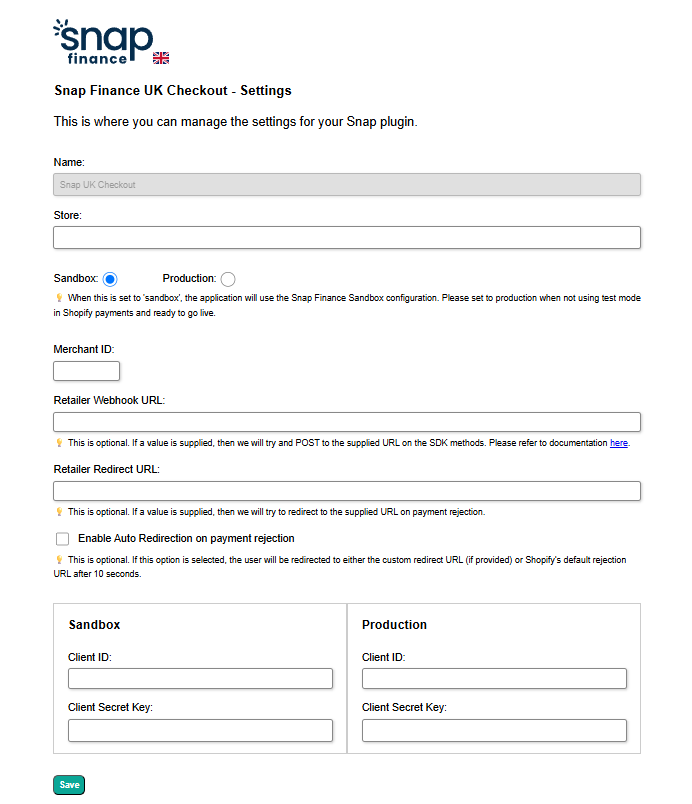
Once you've entered all credentials, use the toggle at the top of the screen to select which environment is active (Sandbox for testing, Production for live checkout).
Sandbox vs Production: Please use your sandbox Merchant ID for sandbox and your production Merchant ID for production. If you only have credentials for one environment then you may fill the fields of the other with dummy credentials, such as 12345, etc.
The toggle determines which one is active on your store. You can switch between them at any time.
• Click Save. You will be redirected to Settings → Payments in your Shopify dashboard.
Step 3: Activation
On first install, Shopify redirects you straight to Settings → Payments. If you land somewhere else, or you want to activate the plugin later, navigate there manually from your Shopify admin.
• Locate Snap Finance UK in the payments list and select it to enter its Shopify settings.
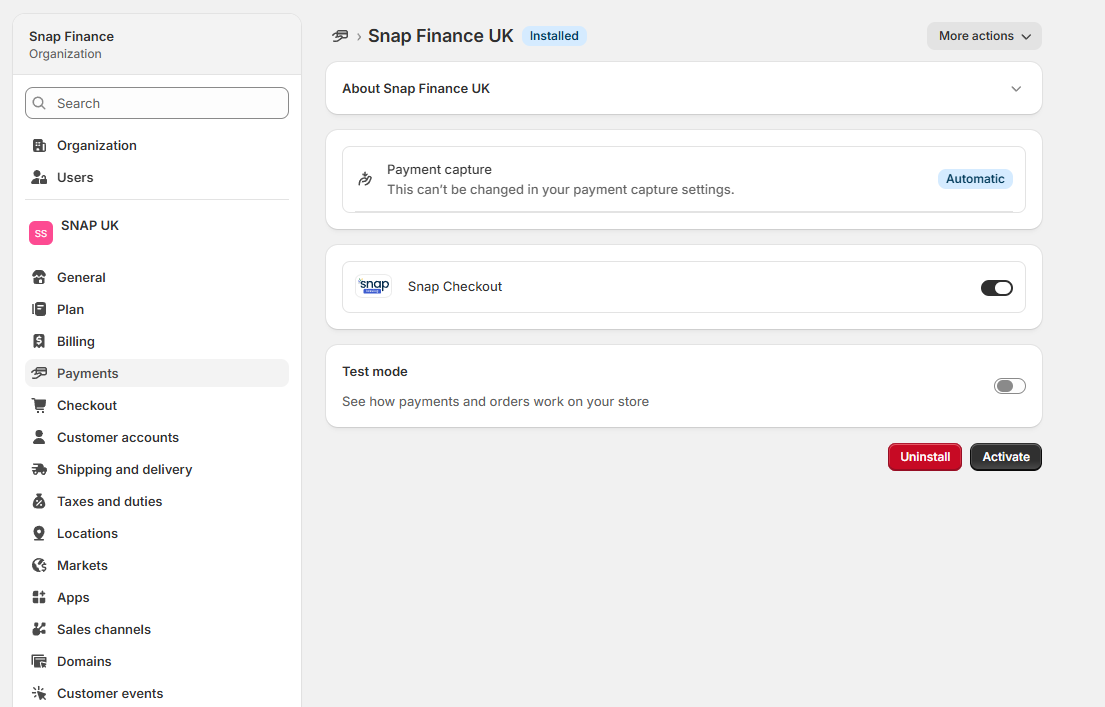
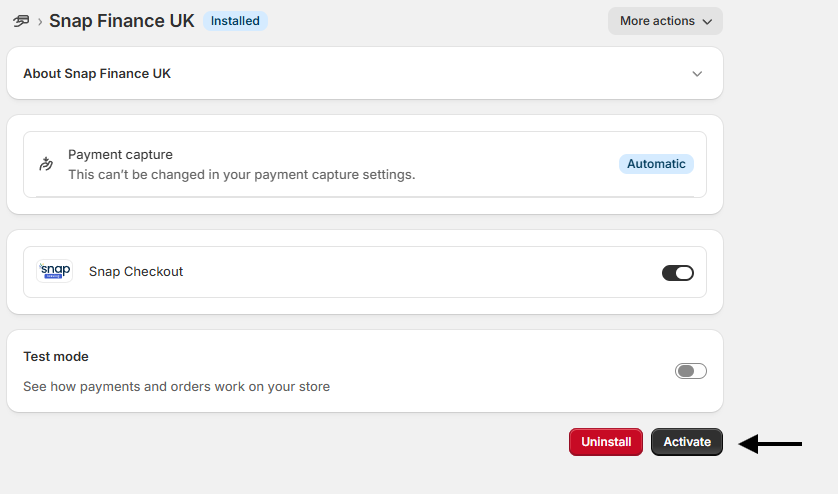
• Click Activate. Snap Finance is now available as a payment option at checkout.
A note on ordering: Shopify determines the position of each payment method at checkout automatically. It cannot be reordered from within the plugin.
Step 4: Verification
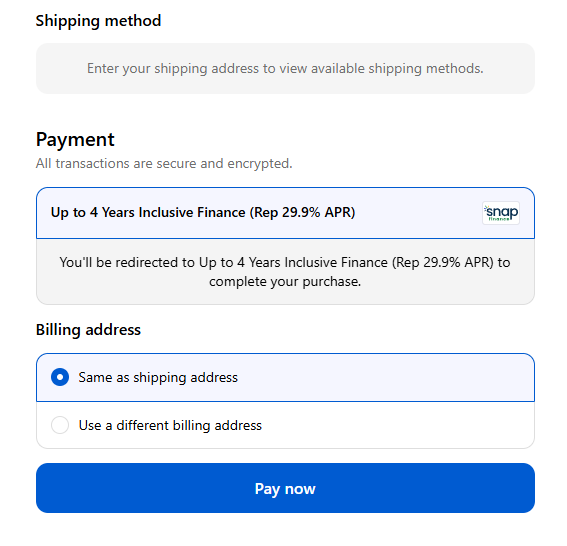
Before going live, confirm the plugin is appearing correctly:
• Add a test item to your cart and proceed to checkout.
• Confirm Snap Finance appears in the list of payment options.
Order Management
Eligibility
A minimum total basket value of £250 is required to pay with Snap Finance.
If a customer's total basket value is below this minimum, they will be shown an alert when entering our payment gateway notifying them of the eligibility requirement, and they will not be able to proceed.
The customer journey
The steps below outline the customer experience when they choose to pay with Snap Finance at checkout.
A note on timing: customers have one hour to complete the journey. This is because Shopify automatically moves any basket left at checkout for more than an hour into its Abandoned checkouts section. The customer is told about the one-hour limit at the start of the journey, and if they reach it they are returned to the checkout.
The customer will be able to re-enter the application journey at the point in which they left, and will not lose their progress.
Most customers complete their application within 15 minutes.
1. Select Snap Finance at checkout
At checkout, the customer selects Snap Finance as their payment option and proceeds.
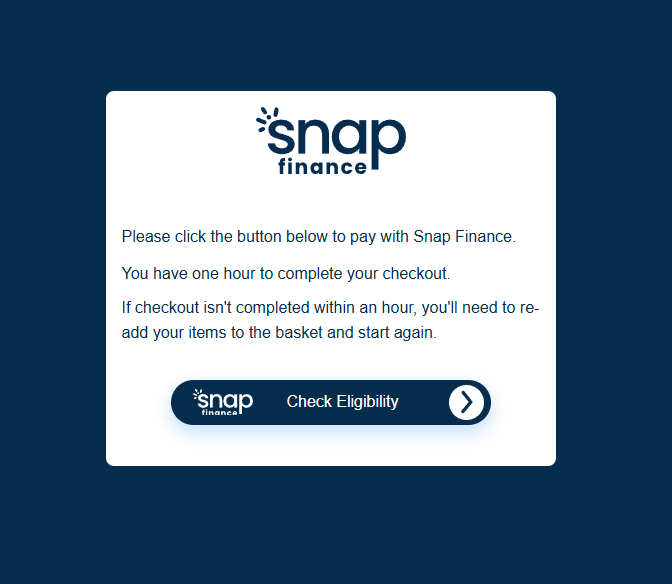
2. Apply on the Snap payment gateway
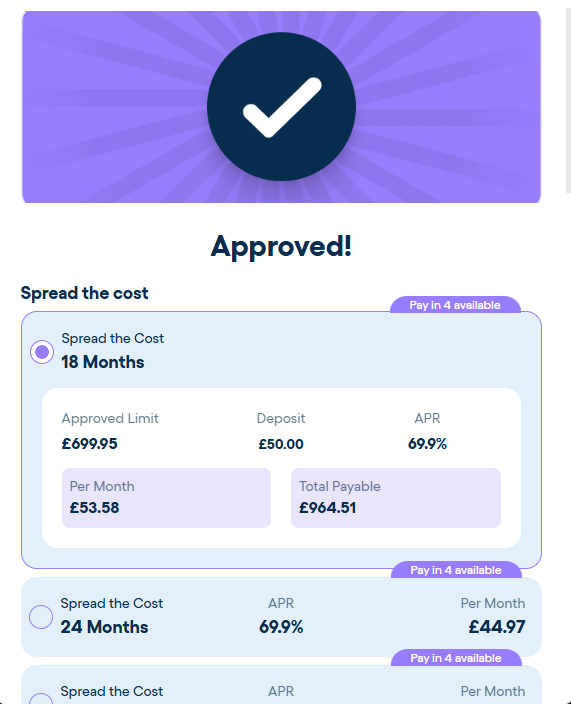
The customer is taken to the Snap payment gateway, where they apply for finance and receive an instant decision and offer.
Please note that the values displayed are for demonstration purposes only and are not indicative of a real finance offering.
3. Sign the finance documents
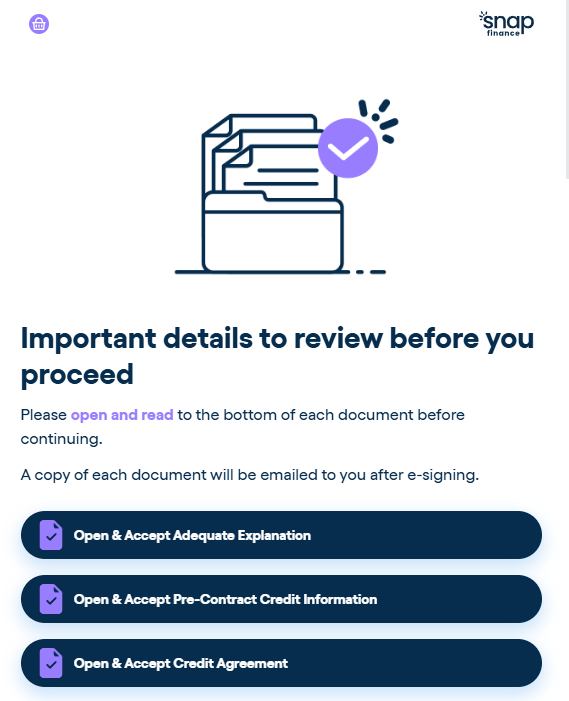
The customer reviews and signs their documents, finalising the loan.
4. Return to checkout
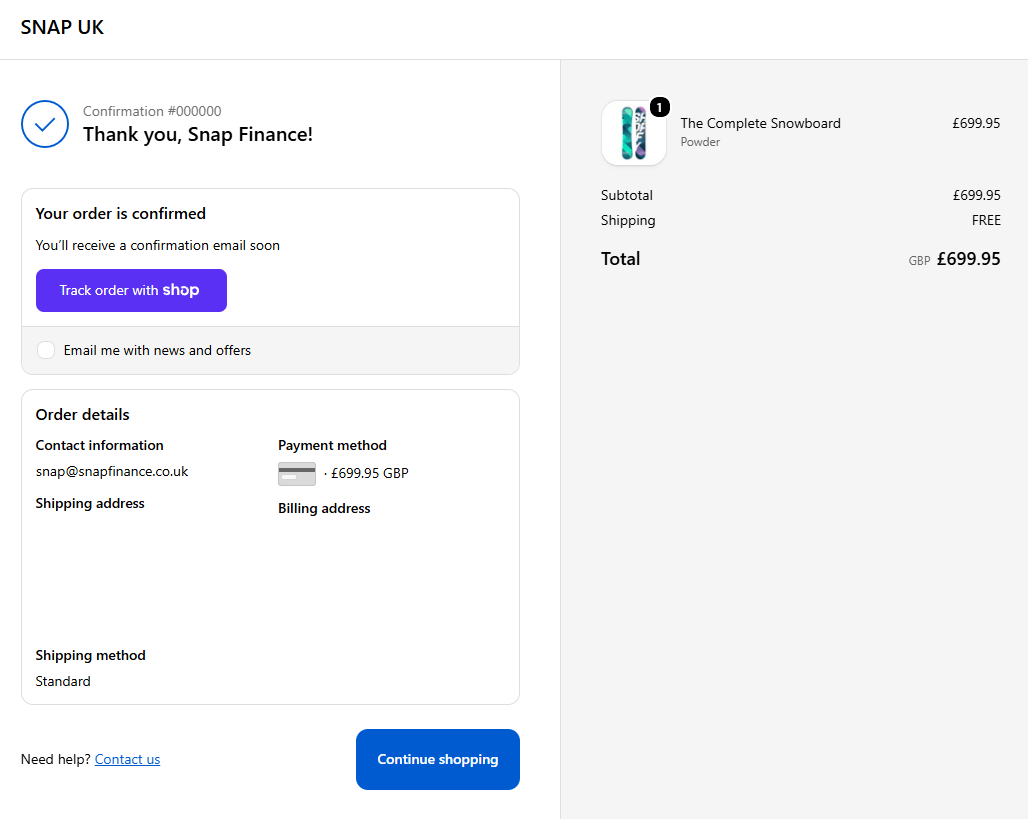
Once signed, the customer is returned to the checkout and an order is created. The customer will receive an email from us verifying their application and supplying the relevant documentation.
If the customer is declined
If the customer's application is declined, they are simply returned to the checkout, where they can choose an alternative payment method.
If the customer has an existing incomplete application
If the customer already has an incomplete application, they will be able to pick up from where they previously left off in the journey as soon as they enter the payment gateway.
Order creation and status
When a customer completes their application journey and signs their documents, we create the corresponding order in Shopify.
The order will show as Unfulfilled in Shopify and as Pending delivery in our system.
You can view all of your applications in the Snap Merchant Portal, which is the ultimate source of truth for all of your applications. Your orders will also be visible on your Shopify Orders page.
Marking orders as delivered
Marking an order as delivered will move its status in our system from Pending delivery to Complete, and is the final step in completing the application process.
You can mark an order as delivered in one of two ways: by fulfilling the order in Shopify, or by marking it as delivered directly in the Snap Merchant Portal. Either method updates the order status in our system.
Please note: changes made in the Merchant Portal do not flow back into Shopify. Marking an order as delivered in the Merchant Portal will update our system, but will not modify the order in Shopify.
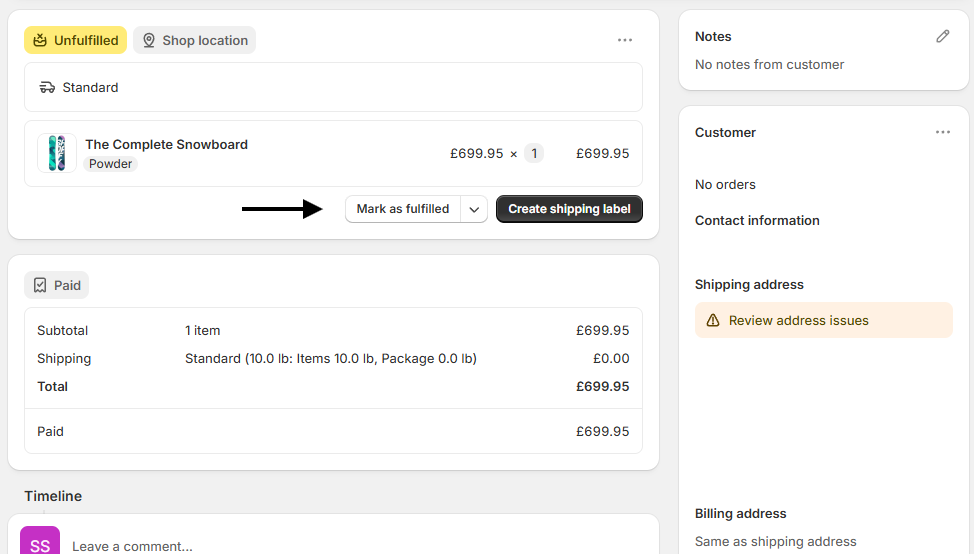
Fulfilling an order in Shopify
• In your Shopify admin dashboard, go to Orders and open the order you want to fulfil.
• Click Fulfil item (or Mark as fulfilled).
• Confirm the fulfilment. The order status will update to Fulfilled in Shopify and Complete in our system.
Orders should only be fulfilled once the entire order has been dispatched. We do not support partial fulfilment through Shopify — fulfilling an order marks the whole order as delivered.
Where possible, this should be confirmed by checking the application in our Merchant Portal.
Refunds and cancellations
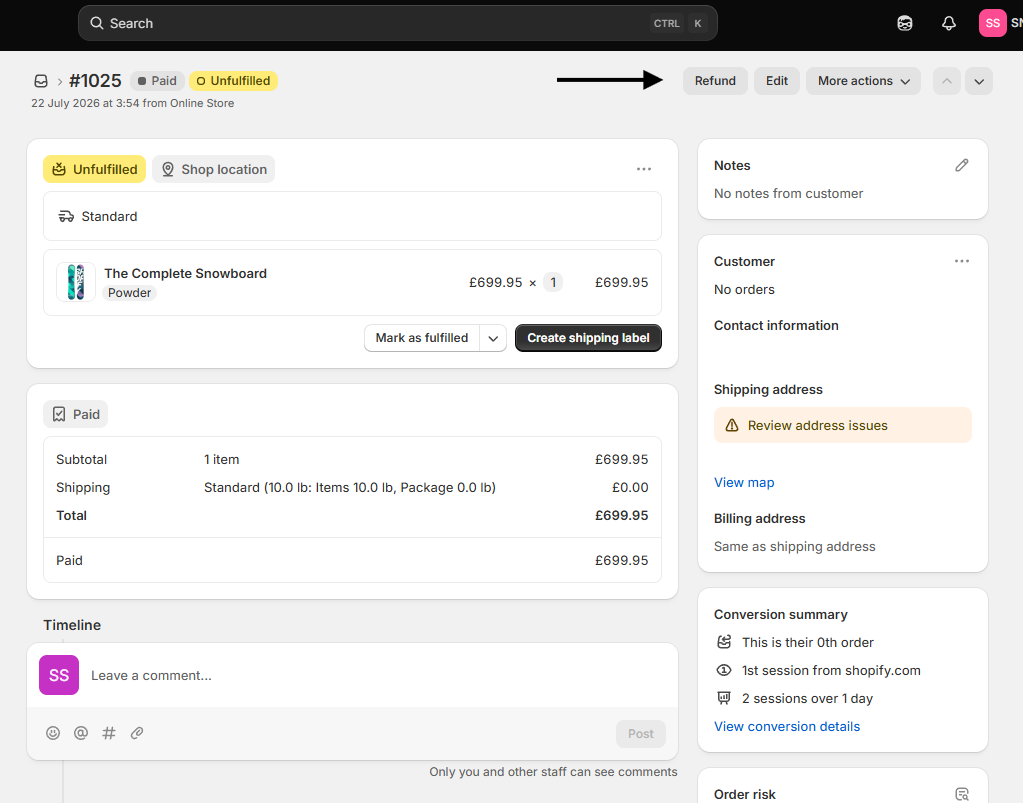
To refund an order, follow Shopify's standard refund flow:
• In your Shopify admin dashboard, go to Orders and open the order you want to refund.
• Click Refund.
• In the following page, enter the quantity or amount to refund, then click Refund to confirm.
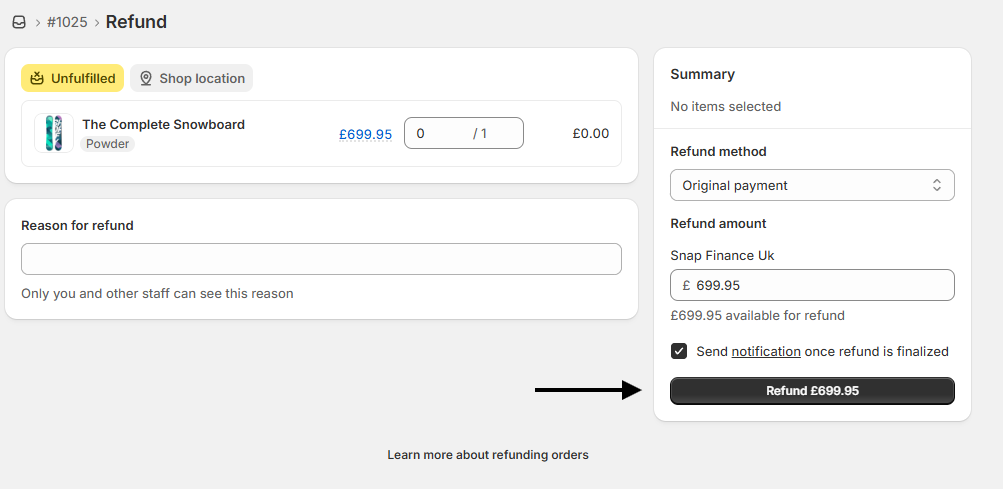
Partial refunds are supported. Issuing a partial refund will automatically adjust the customer's finance agreement and notify them of the change.
To cancel or withdraw an order, please contact our operations team.
Where possible, this should be confirmed by checking the application in our Merchant Portal.
Additional information
On-site messaging
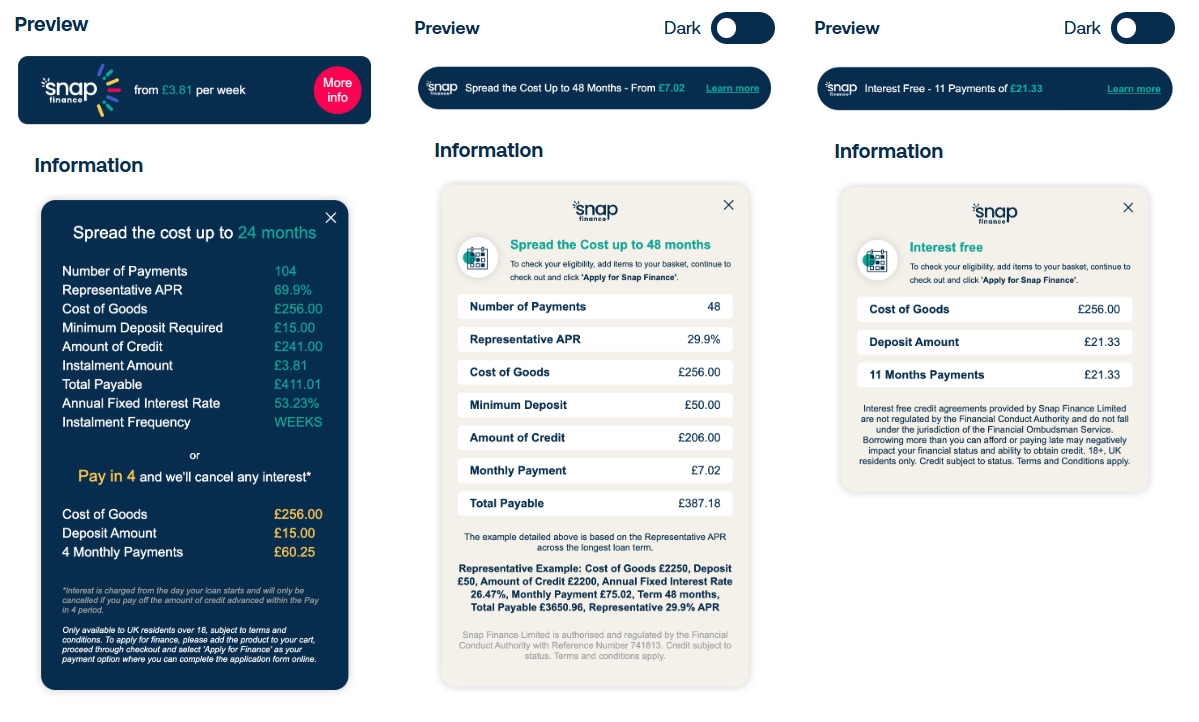
To promote Snap Finance across your storefront we provide a range of product widgets that display finance messaging to your customers.
For available widget types and installation instructions, see our product widgets documentation.
The Snap Merchant Portal
The Snap Merchant Portal is where you view and manage all of your Snap Finance applications and orders. It is the ultimate source of truth for the status of every application.
Access details for the Merchant Portal will be provided during your onboarding and training. If you need access, or have lost your login details, contact your Snap Finance account manager.
Managing the plugin
Once installed, you can revisit the plugin at any time to update your details or remove it.
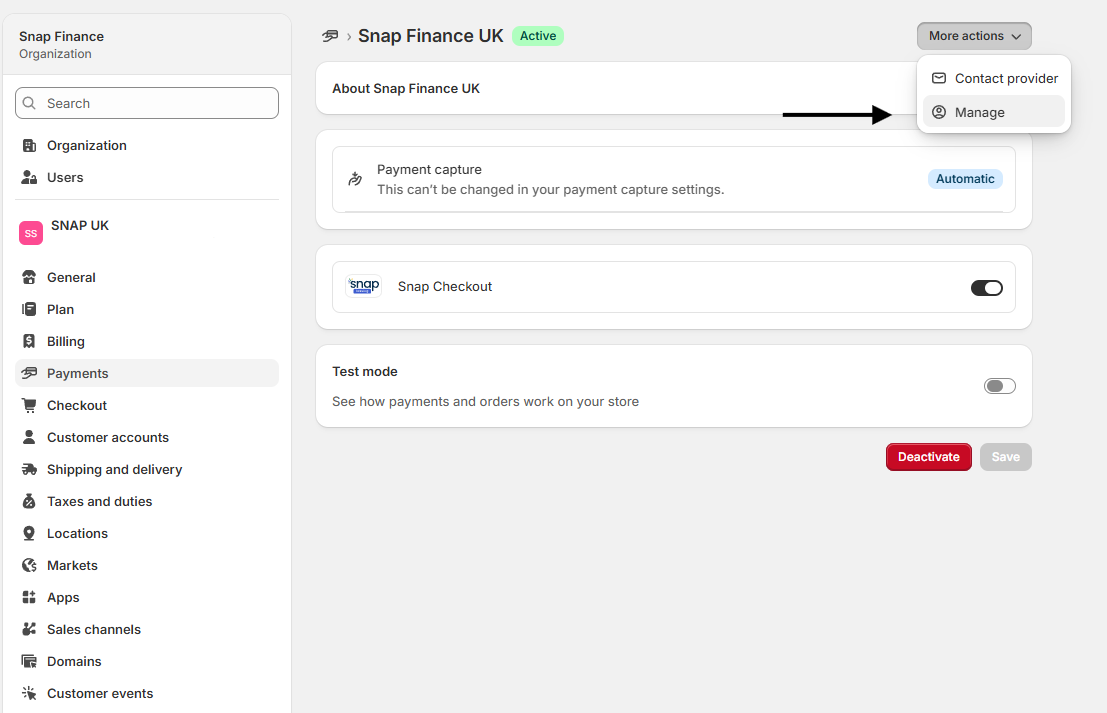
To edit your credentials or reopen the configuration screen, go to Settings → Payments → Snap Finance UK, click the More actions menu in the top right, then click Manage.
Deactivating or uninstalling
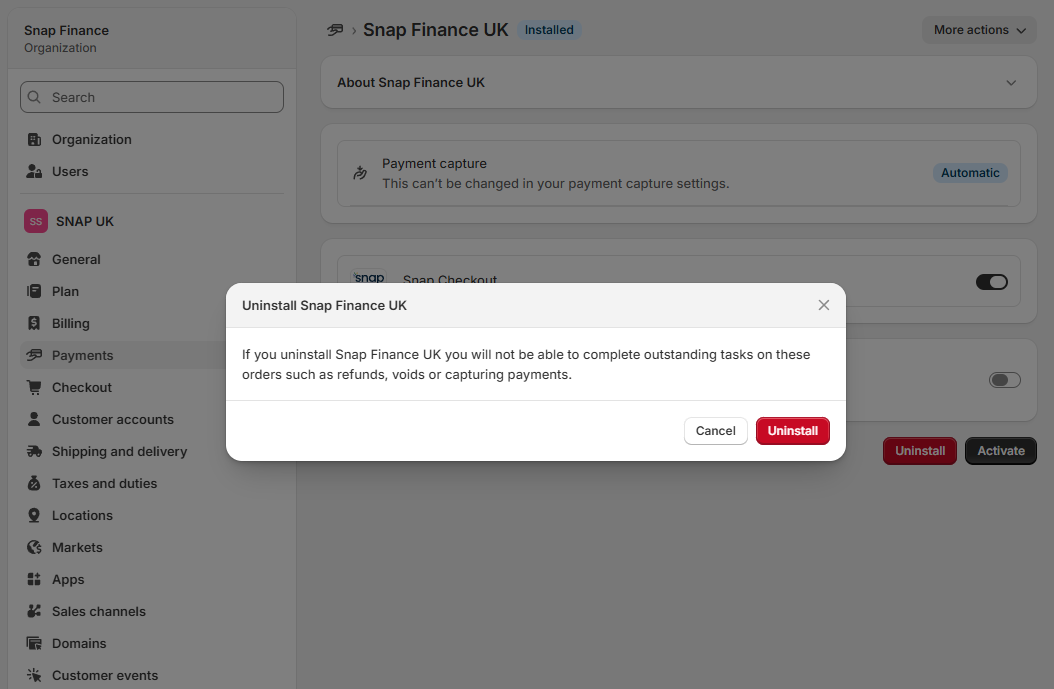
Go to Settings → Payments → Snap Finance UK, click Deactivate, then Uninstall and Uninstall again in the dialog box that appears.
Need help?
For any queries please contact your Snap Finance account manager.